How to: Organising Your Wedding Invitations
The scramble to design the perfect wedding invitations can leave you overwhelmed, particularly since your invitations will serve as your guests’ preview of the wedding.
Fortunately, you can avoid the daunting task of getting your invites together for a while, since most people send them out six to 10 weeks prior to the wedding. If you’re overwhelmed by the seemingly limitless options, have no fear! Brideonline.com.au is here to rescue you from the stress.
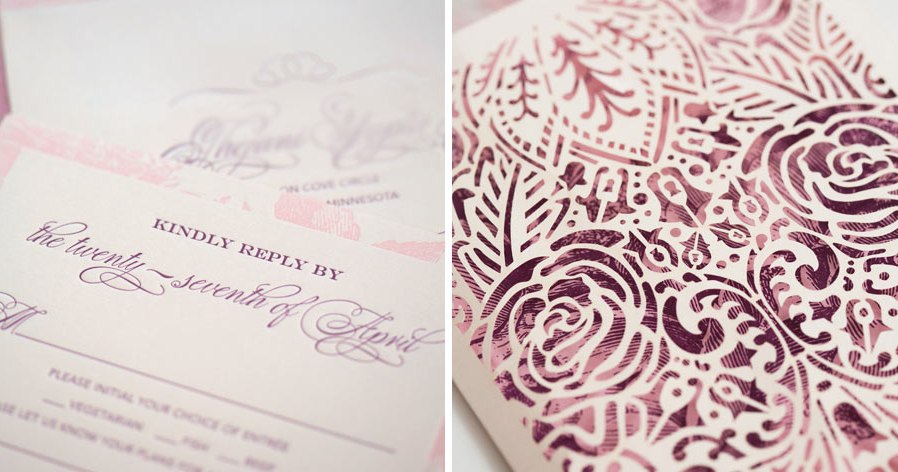
(Courtesycecinewyork.com)
Invitation Basics
The first step toward getting your invitations ready is determining when you need to send them out. Contemporary brides frequently send out “save the dates” to notify their guests of the wedding date, and if you do this, you can hold off on invitations. If you’re not doing save the dates or have a destination wedding, though, you’ll need to give your guests ample time to plan for your wedding. Aim for two to three months prior to the big day. Plan on spending between two and 10 percent of your budget on invitations; however, if you want to spend far more or far less, make sure you adjust your overall budget accordingly.
Choosing Your Style
Before you begin paging through images of invitations, you need to choose your style. Otherwise, you can very easily get overwhelmed by your options! A great idea is to keep some kind of pinboard or look-book of invitations, colour schemes, or styles you love. Another fail-safe option is to take inspiration from the elements of your wedding you’ve already organized, such as the colours of your centrepieces or the bridesmaids’ dresses. Your invitations should also match the formality of your wedding. Are you having a black-tie gathering? Time to break out the fancy script and letterpress invites. Simple beach wedding? Stick with simple wording and invitations that give out a relaxed vibe. Here are some other things to consider:
- Invitation wording. If you’re having a formal wedding, stick with more traditional wording in a fancy script. You’ll also need to decide who’s doing the inviting and who’s names appear on the invitations. Traditionally, the bride’s parents are the inviters, but contemporary weddings frequently name both sets of parents or even leave the parents out altogether.
- Invitation information. Keep it short, sweet, and to the point. Include the date, time, location of the ceremony, as well as any pertinent information about dress codes. If the reception is at a different location, don’t forget to include it! You can attach separate cards with a map, directions, information about lodging, transport, and other crucial details.
- Paper style and size. Thick cardstock and letterpress invitations are generally more expensive and convey a more formal style. There’s no hard and fast rule for invite sizes. Instead, pick something you like, but keep in mind that larger invitations can cost more to mail.
- Additional enclosures. Brides are increasingly using invitations with pockets to make it easier to include reception information, directions, invitations to the rehearsal information, and other details their guests need. If there are multiple wedding events, you’ll likely need several smaller cards. If your wedding is a simpler affair, though, you can save cash by making a single-page invitation.
- Frills. You can add all kinds of details to your invitation to help set the theme and make your invitation stand out. Stickers, rhinestones, glitter, a small photo, or even a memento of the wedding-to-comd can make your invitation one that your guests will be thrilled to put on their fridges!
Doing It Yourself
The DIY world has come an incredibly long way! Gone are the days of shoddily printed photos and invitation card that doesn’t quite hit the mark. With an increased demand for cheaper DIY invitations over the past few years, many manufacturers have made a concerted effort to make creating the invitations yourself far easier and more professional looking.
Whether you’re looking to buy locally or online, the general process is the same: you need to design the card, have the relevant pages printed, and then assemble the remaining parts – invitation card, accent colour backing, any pockets, and any other details – together.
Many invitation websites are linked with a professional printer and will give you a realistic preview of what the invitation should look like. Additionally, many sites offer fair policies regarding returns- just make sure you read the fine print and give yourself ample time to get the invitations right.
If you’d rather buy your wares in person, check out reputable craft and stationery stores, as well as any paper warehouses, if you’re lucky enough to have one in your area. Again, these stores should be linked to, or at least be able to recommend, specific printing presses according to your specific needs. These are also excellent starting points for DIY ideas, along with crafty sites like Pinterest, Etsy, and Craftgawker.
If you’re feeling particularly crafty, try getting a very simple invitation printed on simple card stock, then adding the embellishments yourself. Some easy – and blessedly cheap! — embellishment ideas include:
- Adding a pop of bling by attaching a rhinestone or crystal
- Looping a charm or a simple message written on a tag through a string, then using the string to tie your invitation shut.
- Using photo invitations to pop in a copy of your engagement photos.
- Personalizing your invites by dropping a tiny memento – such as a seashell from the beach where you’ll be married or a few rose petals – into the envelope.
Doing it yourself means staying organized, so try getting a couple of folders or drawers for each piece of the invitation. Then take a little time each day to design or assemble a few invitations. Pacing yourself means you won’t feel rushed and quality won’t suffer.
Paying for Invites
If the idea of spending time designing or even making your own invites sounds like the worst way to spend your engagement, you’re not alone. Paying someone else to make your invitations is an excellent way to save time and ensure you get a great result. When you hire a professional, you won’t have to worry about minor details, and if there’s a printing mistake or other error, you won’t have to fix it. Even better, if you pay for invites, you can get letterpress invites with engraved printing and elegant designs.
This route tends to be more expensive, but there are still options for saving cash. Try purchasing matching envelopes separately, going through a small, independent business, and asking about bulk discounts. If an invitation is being discontinued or is out of season, it might be cheaper, so be sure to ask about clearance items. Generally speaking, the more popular and respected the brand is, the more cash you’re going to have to dole out. If you’re hoping for artful invitations at a discounted price, try a website such as Etsy, where independent crafters can help you design the invite of your dreams. You’ll need to allow plenty of time for a professional to design your invites, order supplies, and provide you with samples. If you’re going the professional route, plan on starting your invites no more than four to six months before your wedding.
It’s true that you’ve got plenty of options to wade through, but once you’ve picked a style, invitation-making is relatively smooth-sailing. So sit back, take a deep breath, and start designing those invites. After all, they’re the one thing that makes the difference between the wedding that no one knew about and the wedding that everyone remembers!


